
Baking a loaf of bread might seem daunting, but with a little patience and the right guidance, you’ll be pulling fragrant, golden-brown loaves out of your oven in no time. This comprehensive guide will equip you with everything you need to know about How To Bake A Loaf Of Bread, from choosing the right ingredients to mastering essential techniques. So, tie on your apron, and let’s get baking!
Table Of Contents
- Understanding the Basics of Bread Baking
- Yeast: The Heart of Your Loaf
- Kneading: Developing Gluten Strength
- Proofing: A Time for Growth
- A Step-by-Step Guide to Baking a Loaf of Bread
- Tips for Baking the Perfect Loaf
- Exploring Different Types of Bread
- Sourdough Bread: A Tangy Delight
- Whole Wheat Bread: A Nutritious Choice
- Storing Your Homemade Bread
Right after you’ve mastered the basics of baking a simple loaf, you might want to explore more complex flavors. For example, try some of our best high protein bread recipes. They’re packed with nutrients and offer a satisfying chewiness.
Understanding the Basics of Bread Baking
Before we dive into the how-to, let’s cover some fundamental principles that will help you along the way. Baking bread is a science, and understanding the “why” behind each step will make you a more confident baker.
Yeast: The Heart of Your Loaf
Yeast is a single-celled microorganism that, when activated, produces carbon dioxide gas. This gas is what makes your dough rise and gives your bread its airy texture. There are several types of yeast, but the most common are active dry yeast and instant yeast. While both require warm water for activation, instant yeast can be mixed directly into the dry ingredients, saving you a step. Imagine yeast as tiny balloons inflating within your dough, creating pockets of air and lightness.
Kneading: Developing Gluten Strength
Kneading is the process of working your dough to develop gluten. Gluten is a protein that forms elastic strands, giving your bread its structure and chew. Think of gluten as tiny rubber bands that trap the carbon dioxide produced by the yeast, allowing the dough to rise beautifully.
Proofing: A Time for Growth
Proofing is the process of letting your dough rest and rise. There are two proofing stages: the first rise (bulk fermentation) and the second rise (after shaping). During proofing, the yeast consumes the sugars in the dough and produces carbon dioxide, causing the dough to expand. This process develops flavor and creates the airy texture we love in a good loaf of bread.
 Kneading Dough for Bread
A Step-by-Step Guide to Baking a Loaf of Bread
Now, let’s walk through the process of how to bake a loaf of bread. This guide is for a basic white loaf, but the principles can be applied to many other types of bread.
-
Activate the Yeast: In a large bowl, combine warm water (around 105°F) with sugar and yeast. Let it sit for 5-10 minutes until foamy. This tells you the yeast is alive and ready to work.
-
Combine the Ingredients: Add flour, salt, and any other dry ingredients to the yeast mixture. Stir until a shaggy dough forms.
-
Knead the Dough: Turn the dough out onto a lightly floured surface and knead for 8-10 minutes until smooth and elastic. It should bounce back slightly when you poke it with your finger.
-
First Proof (Bulk Fermentation): Place the dough in a greased bowl, cover, and let it rise in a warm place for 1-2 hours, or until doubled in size.
-
Shape the Loaf: Gently punch down the dough to release the air. Shape it into a loaf and place it in a greased loaf pan.
-
Second Proof: Cover the loaf pan and let the dough rise for another 30-45 minutes, or until it almost reaches the top of the pan.
-
Bake: Preheat oven to 375°F. Bake the loaf for 30-40 minutes, or until golden brown and the internal temperature reaches 200°F.
-
Cool: Remove the loaf from the pan and let it cool completely on a wire rack before slicing and serving.
 Proofing Bread Dough
Tips for Baking the Perfect Loaf
Here are a few tips to elevate your bread-baking game:
-
Use a kitchen scale: Measuring ingredients by weight is more accurate than measuring by volume and will yield more consistent results.
-
Don’t overknead: Overkneading can result in a tough loaf. Stop when the dough is smooth and elastic.
-
Use an oven thermometer: Ensure your oven temperature is accurate for even baking.
-
Let the bread cool completely: This allows the internal structure to set and prevents a gummy texture.
For those intrigued by the versatility of bread, our banana bread recipe offers a delightful sweet treat, perfect for breakfast or an afternoon snack. It showcases a different side of baking with bread, proving how adaptable this staple truly is.
Exploring Different Types of Bread
Once you’ve mastered the basic loaf, there’s a whole world of bread to explore. From sourdough to rye to whole wheat, each type offers unique flavors and textures.
Sourdough Bread: A Tangy Delight
Sourdough bread is made with a sourdough starter, a fermented mixture of flour and water that acts as a natural leavening agent. It has a distinctive tangy flavor and a chewy texture.
Whole Wheat Bread: A Nutritious Choice
Whole wheat bread is made with whole wheat flour, which contains the bran, germ, and endosperm of the wheat kernel. It’s more nutritious than white bread and has a slightly nutty flavor. You can find a variety of whole wheat bread recipes, including our collection of the best high protein bread recipes, to satisfy your nutritional needs.
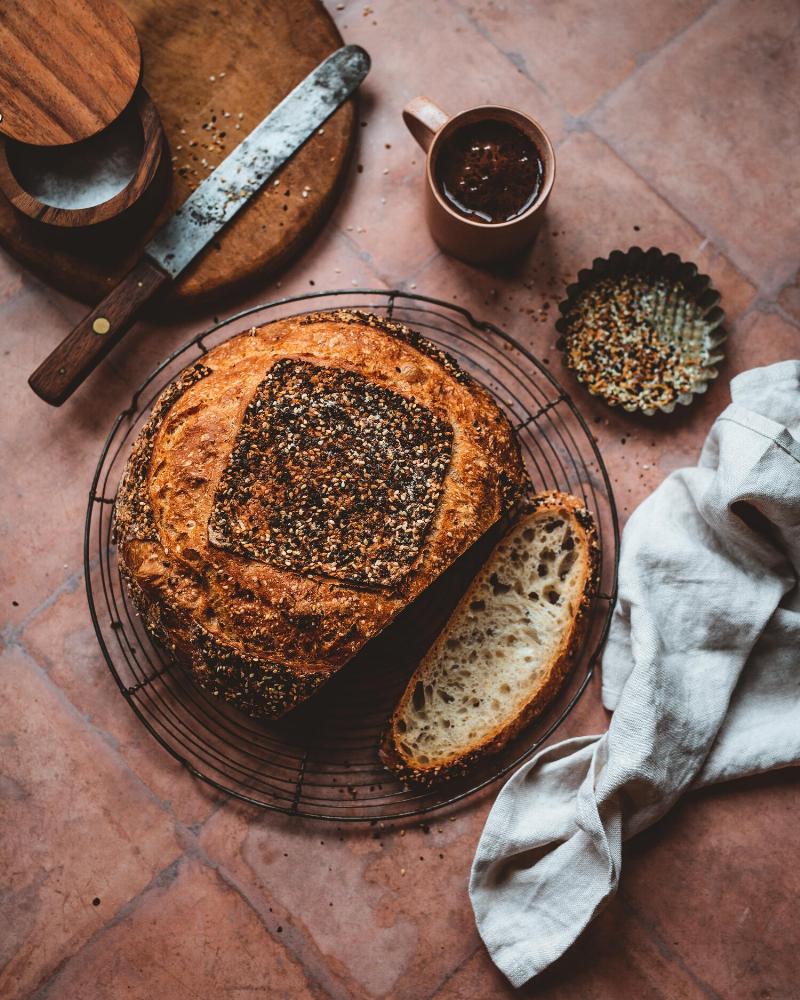
 Baked Loaf of Bread
Thinking about trying sourdough? Our sourdough bread recipes offer step-by-step instructions and helpful tips for mastering this artisan bread.
Storing Your Homemade Bread
Proper storage will keep your bread fresh for longer. Once cooled, store your bread in an airtight container at room temperature for up to 3 days. For longer storage, you can freeze it. Check out our guide on The best way to store baked goods for freshness for more detailed advice on preserving your delicious creations. It covers a range of baked goods, ensuring you get the most out of your baking efforts.
If you’re looking for the ultimate banana bread experience, our curated list of the best banana bread recipes is a must-try. It features a variety of options, from classic to innovative, catering to every taste.
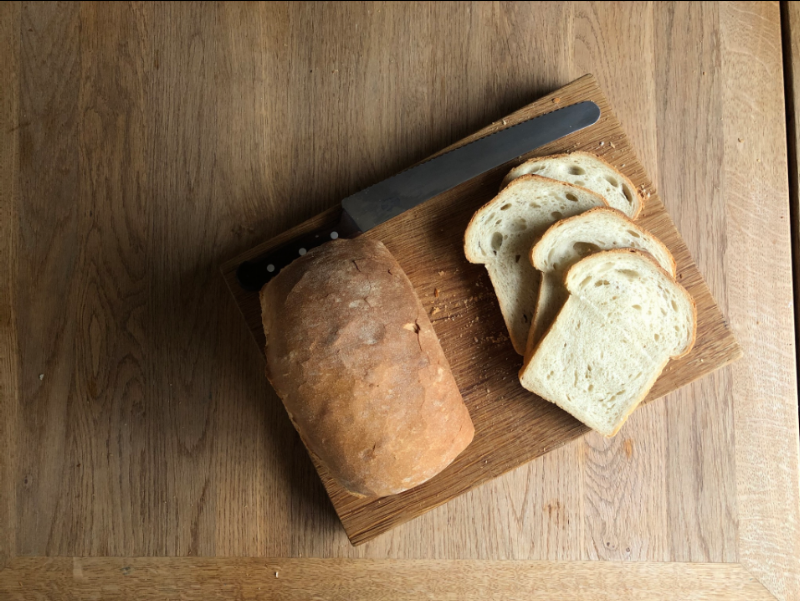
 Sliced Loaf of Bread
So, now that you’re armed with this knowledge, go forth and bake! Remember, practice makes perfect, so don’t be discouraged if your first loaf isn’t perfect. Enjoy the process, and savor the satisfaction of creating something delicious with your own hands. Happy baking!