
Making light, airy dinner rolls that stay soft even the next day can seem like a baker’s dream, but it’s totally achievable! Trust me, I’ve been there – countless batches of dense, hockey-puck rolls before finally cracking the code. Now, I’m excited to share my secrets to How To Bake Soft Dinner Rolls That Stay Fluffy, so you can enjoy warm, pillowy goodness with every meal. Ready to transform your roll game? Let’s dive in!
Table Of Contents
For years, I chased the perfect dinner roll. I tried every recipe, tweaked every ingredient, all in pursuit of that elusive softness. It wasn’t until I understood the science behind the dough that I finally found success. And that’s what we’ll focus on here – not just a recipe (though we’ll get to that!), but the why behind each step, giving you the knowledge to create truly exceptional rolls every single time. For those looking for a quicker start, check out some simple dinner rolls recipes.
 Soft and Fluffy Dinner Rolls Fresh from the Oven
The Secret to Soft, Fluffy Rolls: It’s All About the Dough
The key to soft dinner rolls lies in building a well-developed dough structure. This involves a delicate balance of yeast activity, gluten development, and proper hydration. Think of gluten as tiny balloons that trap the gases produced by the yeast, creating that light and airy texture. Too much gluten, and your rolls will be tough; too little, and they’ll be dense. Proper hydration ensures the gluten strands can stretch and expand, leading to that sought-after fluffiness.
So how do we achieve this balance? It starts with the ingredients. High-quality flour, active dry yeast (or instant yeast), milk (or water), butter, sugar, and salt are the building blocks of our fluffy rolls. But the magic happens in the process.
Kneading: The Foundation of Fluffy Rolls
Kneading is crucial for gluten development. It’s where the magic happens! By kneading the dough, we’re aligning the gluten strands, creating a network that will trap those precious air bubbles. Don’t be afraid to get your hands dirty! A good 8-10 minutes of kneading is usually sufficient. You’ll know the dough is ready when it becomes smooth and elastic, passing the “windowpane test.” This means you can stretch a small piece of dough thin enough to see light through it without it tearing.
The Rise: Patience is Key
After kneading, the dough needs time to rise. This allows the yeast to consume the sugars and produce carbon dioxide, which inflates the dough. A warm, draft-free environment is ideal for this process. I usually let my dough rise for about an hour, or until doubled in size. This first rise, called the bulk fermentation, builds flavor and creates that airy texture.
 Kneading Dough for Soft Dinner Rolls
Shaping and Proofing: Getting Ready for the Oven
Once the dough has risen, it’s time to shape our rolls. There are countless ways to do this, from classic round rolls to elegant knots. The important thing is to handle the dough gently to avoid deflating those precious air pockets. After shaping, the rolls undergo a second rise, called proofing. This allows the yeast to produce a final burst of gas before baking.
You may find yourself with leftover rolls; thankfully, there are ways on how to make dinner rolls that stay soft for days.
Baking: The Final Flourish
Finally, it’s time to bake! A hot oven is essential for creating a golden-brown crust and a light, airy interior. The baking time will vary depending on the size of your rolls, but it’s usually around 15-20 minutes. You’ll know they’re done when they’re golden brown and sound hollow when tapped on the bottom.
 Proofed Dinner Rolls Ready for Baking
Tips and Tricks for Extra Soft Rolls
- Use warm liquids: Warm milk or water activates the yeast more effectively, leading to a better rise.
- Don’t overknead: While kneading is important, overkneading can make the dough tough.
- Create a humid environment during proofing: A damp towel placed over the rising dough helps prevent it from drying out.
- Brush with melted butter after baking: This adds flavor and keeps the crust soft.
- Consider gluten-free dinner rolls recipes if you have dietary restrictions.
FAQs
- Why are my dinner rolls dense? This could be due to underkneading, inactive yeast, or not enough rising time.
- How do I store leftover rolls? Store them in an airtight container at room temperature for up to 3 days or in the freezer for longer storage.
- Can I use bread flour instead of all-purpose flour? Yes, bread flour has a higher protein content, which will result in chewier rolls.
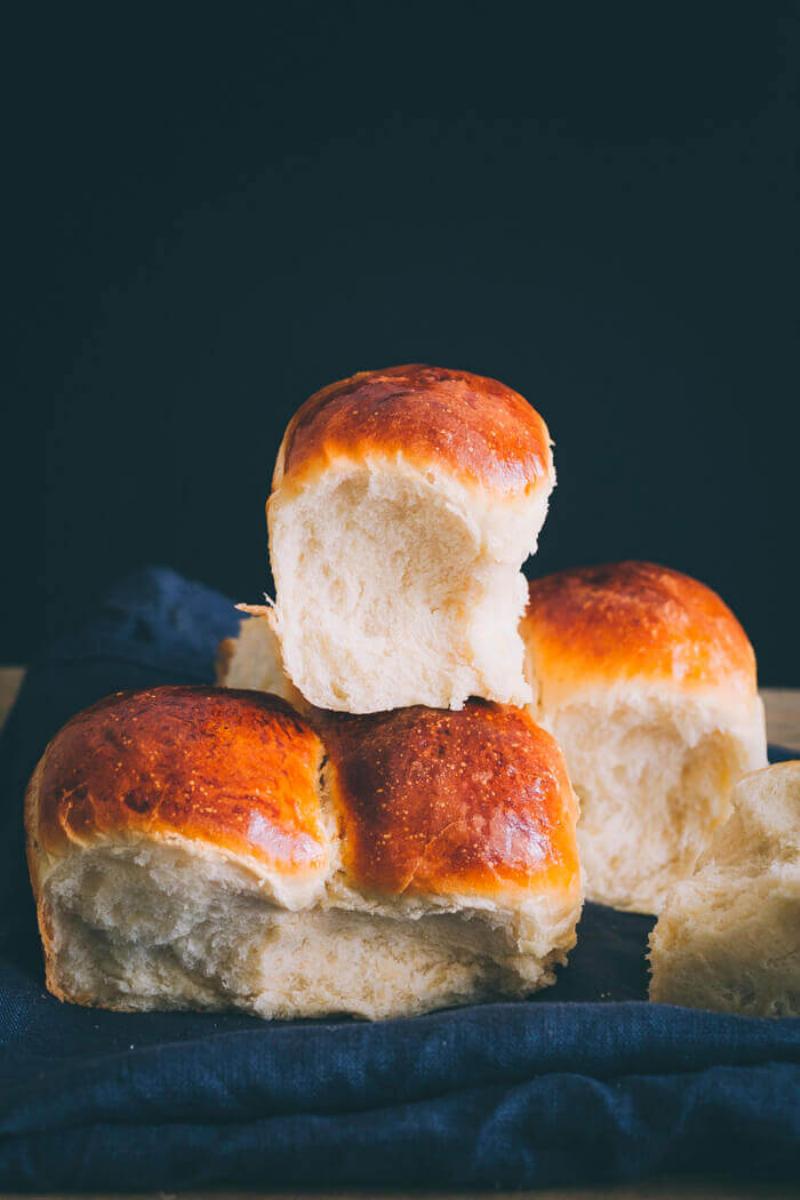 Baked Soft Dinner Rolls on Serving Plate
Conclusion: Enjoy Your Soft, Fluffy Dinner Rolls!
Baking soft dinner rolls that stay fluffy is a rewarding experience. By understanding the science behind the dough and following these tips, you’ll be well on your way to creating delicious, airy rolls that will impress your family and friends. So gather your ingredients, get your hands dirty, and enjoy the process! Don’t forget to share your baking triumphs (and maybe even some delicious photos!) in the comments below. Happy baking! If you enjoyed these tips, try out other variations of soft dinner rolls by searching for simple dinner rolls recipes.