
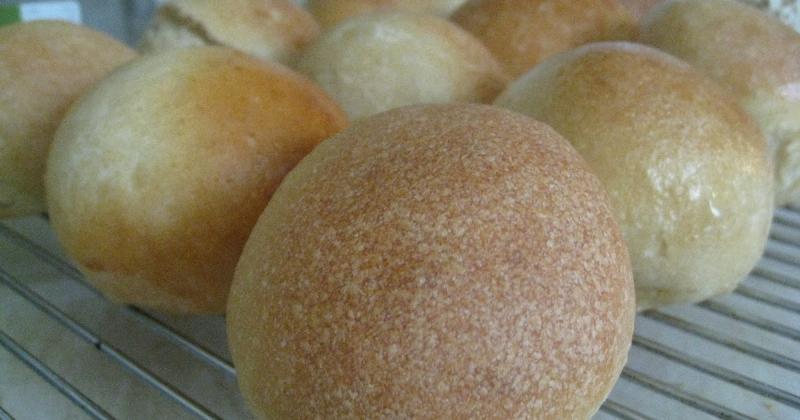
A beautifully burnished, glistening crust is the crown jewel of any loaf of bread. It’s a sign of a well-baked loaf, promising a satisfying crunch and a depth of flavor. But achieving that perfect sheen can sometimes feel like an elusive baking secret. Fear not, fellow bread bakers! This comprehensive guide will unlock the mysteries of How To Make A Shiny Bread Crust, transforming your loaves from simple to spectacular.
Table Of Contents
Getting a shiny crust isn’t just about aesthetics; it also impacts the texture and flavor. A good crust provides a satisfying contrast to the soft interior, adding a delightful chewiness. So, are you ready to elevate your bread baking game and discover the secrets to a truly magnificent crust? Let’s dive in!
The Science Behind the Shine
Before we get into the practical tips, let’s understand the science behind a glossy bread crust. The shine is primarily due to the process of gelatinization, which occurs when starches on the bread’s surface are exposed to moisture and heat. This creates a thin, almost glassy layer that reflects light, giving the crust its characteristic sheen. Think of it like caramelizing onions – the heat transforms the sugars, creating a sweet and glossy finish. Similar to What is the purpose of egg wash in baking?, applying a wash to your bread can greatly impact the final outcome.
Another key factor is the Maillard reaction, a chemical process that occurs between amino acids and reducing sugars at high temperatures. This reaction is responsible for the browning and delicious aroma of baked goods, further enhancing the crust’s appeal. Just like that perfect sear on a steak, the Maillard reaction plays a crucial role in developing both flavor and color.
Techniques for a Gleaming Crust
Now that we’ve covered the science, let’s explore the practical techniques that will help you achieve a shiny bread crust every time:
Steam Power: Unleashing the Shine
Steam is your secret weapon when it comes to a glistening crust. Introducing steam into the oven during the initial stages of baking creates a humid environment that promotes gelatinization. This humidity helps the starches on the bread’s surface break down and form that desirable glossy layer.
You can create steam in several ways:
- Spray Bottle: Spritzing the oven walls with water just before placing the bread inside is a simple and effective method.
- Water Pan: Placing a pan of hot water on the oven floor creates a consistent source of steam throughout the baking process.
- Ice Cubes: Tossing a few ice cubes into a hot pan in the oven creates a burst of steam.
- Dutch Oven: Baking bread in a dutch oven traps the moisture released from the dough, creating a steamy environment naturally.
The Power of Washes
Applying a wash to your bread dough before baking can dramatically enhance the shine. Here are some popular options:
- Egg Wash: A classic choice, egg wash creates a rich, golden-brown color and a beautiful sheen. You can use whole eggs, egg yolks, or egg whites, each producing a slightly different effect.
- Milk Wash: Milk wash produces a softer, more subtle shine and a lighter crust color.
- Water Wash: While simple, a water wash can still promote a decent shine, especially when combined with steam.
Baking Temperature and Time
Baking at the correct temperature and for the appropriate time is essential for a shiny crust. A high initial temperature helps create steam and kickstart the Maillard reaction. Gradually reducing the temperature later in the baking process ensures the bread cooks through without burning the crust. Remember that how to use a convection oven for baking might require adjusting the baking time and temperature for optimal results.
Flour Choices
The type of flour you use can also affect the crust’s appearance. Bread flour, with its higher protein content, contributes to a better rise and a more robust crust that holds its shape well, allowing for a more even shine.
Dough Hydration
The amount of water in your dough, also known as hydration, plays a vital role in crust development. A higher hydration dough will typically result in a crispier, more blistered crust, which can also contribute to a more pronounced shine.
 Different Bread Washes Comparison
Troubleshooting Common Issues
Sometimes, despite your best efforts, the crust might not turn out as shiny as you’d like. Here are a few common problems and their solutions:
- Dull Crust: This could be due to insufficient steam or baking at too low a temperature. Try increasing the steam or adjusting the oven temperature.
- Uneven Shine: This might indicate uneven heat distribution in your oven. Rotate the bread during baking to ensure even cooking.
- Burnt Crust: If the crust is burning before the inside is cooked, reduce the oven temperature or cover the loaf with foil.
A Baker’s Secret: Enhancing the Shine
Here’s a little trick I learned from a seasoned baker: brushing the hot loaf with a thin layer of melted butter immediately after it comes out of the oven. This adds an extra layer of gloss and richness to the crust. It’s like adding a final touch of polish to your masterpiece.
 Shiny Bread Crust with Butter Brush
FAQs: Your Burning Questions Answered
-
Q: Can I use a convection oven for baking shiny bread?
- A: Yes, but you might need to adjust the baking time and temperature. Convection ovens tend to cook faster and more evenly, so keep a close eye on your bread to prevent burning.
-
Q: What if I don’t have a spray bottle for steam?
- A: You can achieve similar results by placing a pan of hot water in the oven or tossing a few ice cubes into a hot pan.
-
Q: My crust is shiny but tough. What did I do wrong?
- A: This could indicate overbaking or a dough with insufficient hydration. Try reducing the baking time or increasing the water content in your dough.
-
Q: Can I achieve a shiny crust with whole wheat bread?
- A: Absolutely! The same principles apply. You might need to adjust the baking time slightly as whole wheat bread tends to absorb more moisture.
Conclusion: Baking Brilliance
Achieving a perfectly shiny bread crust is a skill that comes with practice and understanding. By mastering the techniques outlined in this guide, you’ll be well on your way to baking loaves that are not only delicious but also visually stunning. So go ahead, embrace the challenge, and enjoy the rewarding experience of creating bread with a crust that truly shines. Share your baking triumphs and tips in the comments below – we’d love to hear about your experiences!
Pingback: How to Prevent Pie Crust from Burning - Bestbaking Recipes
Pingback: How to Use a Steam Oven for Better Baking Results - Bestbaking Recipes