
Ciabatta bread, with its airy crumb and crisp, crackly crust, is a true artisan delight. This seemingly simple bread, however, can be a bit of a challenge for the home baker. But fear not! This guide will unlock the secrets of How To Make Ciabatta Bread, transforming you from a novice to a confident ciabatta creator. Get ready to experience the joy of pulling a perfectly formed, rustic loaf from your own oven.
Table Of Contents
Just imagine: the aroma of freshly baked bread wafting through your kitchen, the satisfying crackle of the crust as you slice into it, and the soft, chewy texture melting in your mouth. That’s the magic of ciabatta, and you’re about to learn how to make ciabatta bread yourself!
This comprehensive guide will cover everything from choosing the right flour to mastering the unique folding technique, guaranteeing ciabatta success. We’ll demystify the high-hydration dough, providing practical tips and clear instructions for achieving that signature open crumb. Are you ready to embark on this delicious journey?
 Mixing Ciabatta Dough
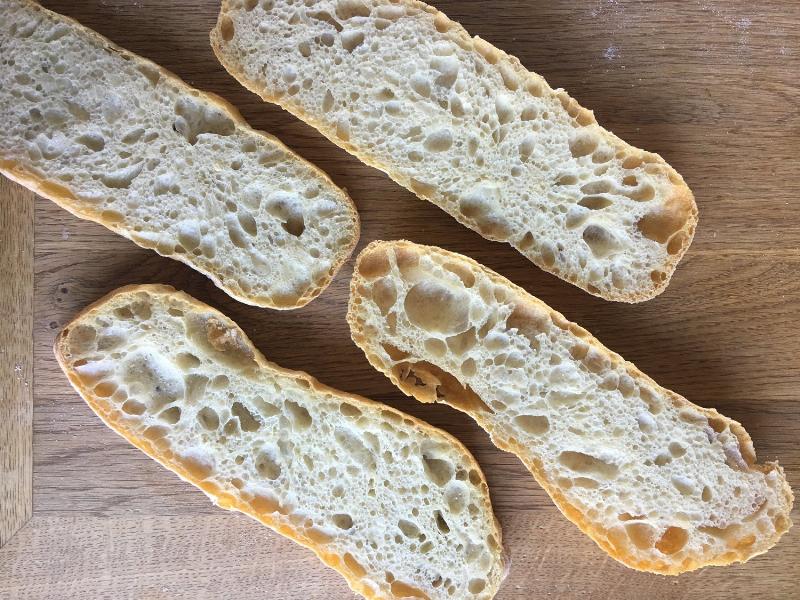
Understanding Ciabatta Dough: Hydration is Key
The defining characteristic of ciabatta dough is its high hydration. This means it contains a higher percentage of water compared to flour than most other bread doughs. Think of it like this: a regular bread dough might be like playdough, firm and easy to shape. Ciabatta dough, on the other hand, is more like thick batter, loose and almost pourable. This high hydration is what gives ciabatta its characteristic open crumb and irregular holes. It’s also what makes it a bit trickier to handle.
Don’t let the wet dough intimidate you, though. Just like getting the hang of riding a bike, it takes a little practice. Once you understand the feel of the dough, you’ll be shaping beautiful ciabatta loaves with ease. Similar to the concepts discussed in The importance of fermentation time in bread making, understanding hydration is essential for achieving the desired texture in your ciabatta bread.
Choosing the Right Flour for Ciabatta
While you can technically use all-purpose flour, using bread flour with a higher protein content will yield better results. The higher protein content develops stronger gluten, which is essential for supporting the structure of the high-hydration dough. This is particularly important in ciabatta, where the gluten needs to be strong enough to hold the numerous large air pockets created by the long fermentation process. For those exploring alternative baking options, you might be interested in keto artisan bread recipes.
 Different Flour Types for Ciabatta Bread
Mastering the Ciabatta Folding Technique
The ciabatta folding technique is what gives the bread its unique, somewhat rustic shape. It’s also crucial for developing the gluten structure. Instead of kneading the dough in the traditional sense, we use a series of folds. These folds gently stretch and align the gluten strands, creating strength and elasticity without overworking the dough.
Step-by-Step Guide: How to Make Ciabatta Bread
## Mixing the Dough
Combine your flour, water, yeast, and salt in a large bowl. Mix until just combined – don’t worry about kneading at this stage. The dough will be very wet and sticky, almost like a batter. This is perfectly normal for ciabatta.
## Bulk Fermentation
Cover the bowl and let the dough rest for a long, slow fermentation, anywhere from 12 to 18 hours. During this time, the yeast will work its magic, developing flavor and creating those beautiful air pockets that give ciabatta its characteristic open crumb. For insights into troubleshooting common bread issues, take a look at this guide on how to prevent bread from crumbling.
## Folding the Dough
After the bulk fermentation, gently fold the dough over itself several times. This process helps to develop the gluten structure further. Be gentle and avoid deflating the dough too much. Imagine you are handling a delicate cloud! This folding technique also contributes to the unique, irregular shape of the ciabatta loaf.
 Folding Ciabatta Dough
## Shaping and Proofing
Once folded, carefully transfer the dough to a well-floured surface. Gently shape it into a rectangle, being careful not to degas it completely. Cover and let it proof for another hour or so.
## Baking
Preheat your oven to a high temperature, around 450°F (232°C). Slide the proofed dough onto a baking stone or baking sheet and bake for 25-30 minutes, or until golden brown and crusty. If you are interested in exploring other gluten-free baking options, check out these delicious gluten free pumpkin bread recipes.
Tips for Ciabatta Success
- Use a kitchen scale for accurate measurements, especially for the water and flour.
- Don’t be afraid of the wet dough! It’s supposed to be sticky.
- A long, slow fermentation is key to developing flavor and texture.
- Be gentle when handling the dough to avoid deflating it.
- A baking stone or baking sheet will help create a crisp crust. For those looking for flavor variations, you can explore these keto garlic bread recipes.
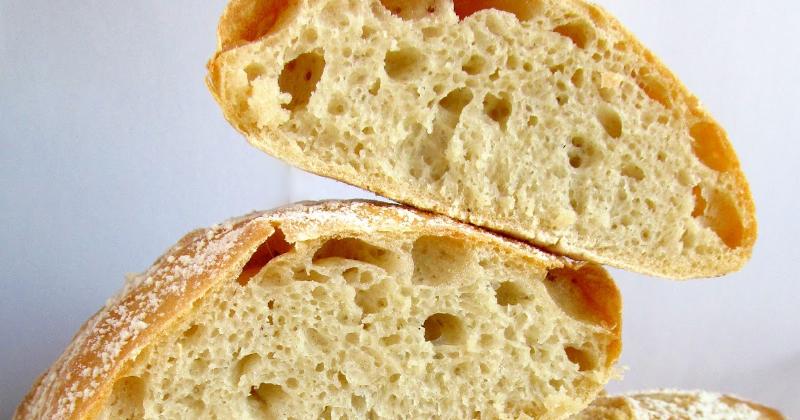 Freshly Baked Ciabatta Loaf
Conclusion
Making ciabatta bread at home might seem intimidating, but with a little patience and practice, you can master this artisan bread. By following these tips and understanding the nuances of high-hydration dough, you’ll be rewarded with a loaf that’s both impressive and incredibly delicious. So, gather your ingredients and get ready to experience the joy of homemade ciabatta – you won’t regret it! Now, go forth and bake some amazing ciabatta bread!