
Baking bread at home can seem intimidating, but with a Dutch oven and a little know-how, you can achieve bakery-quality, crusty loaves right in your own kitchen. Imagine the aroma of freshly baked bread wafting through your home, the satisfying crackle of the crust as you slice into it. That dream can easily become a reality. This comprehensive guide will equip you with all the tips and tricks you need to master the art of Dutch oven bread baking. You’ll be surprised at how simple it can be to create a beautiful, artisan-style loaf with a crispy crust and a soft, airy interior. So, are you ready to elevate your bread game? Let’s dive in!
Table Of Contents
- Understanding the Magic of the Dutch Oven
- Essential Ingredients for Crusty Bread
- Kneading: Developing the Gluten Structure
- Proofing: The Patience of Waiting
- Baking in the Dutch Oven: The Final Act
- Achieving a Golden Crust: Tips and Tricks
- Troubleshooting: Common Crusty Bread Challenges
- Variations: Exploring Different Flavors
- Conclusion: Enjoy the Fruits of Your Labor
Similar to the process described in How to make French baguette at home, the key to crusty bread lies in creating steam during baking. The Dutch oven, acting like a miniature professional oven, traps the steam, resulting in a wonderfully crisp exterior.
 Baking Crusty Bread in a Dutch Oven
Understanding the Magic of the Dutch Oven
Why a Dutch oven? What makes it so special for baking bread? The answer lies in its ability to retain heat and moisture. The heavy lid traps the steam released by the dough as it bakes, creating a humid environment inside the pot. This steam is crucial for developing a thick, crisp crust. The Dutch oven also distributes heat evenly, ensuring a consistently baked loaf. It’s like having a professional steam-injection oven right on your countertop.
Essential Ingredients for Crusty Bread
The beauty of bread making lies in its simplicity. You only need a few basic ingredients: flour, water, yeast, and salt. However, the quality of these ingredients significantly impacts the final result. Using bread flour, with its higher protein content, will give you a better gluten structure and a chewier crumb. Good quality yeast is essential for a good rise. Don’t skimp on the salt – it’s not just for flavor; it also plays a vital role in controlling yeast activity and gluten development.
Kneading: Developing the Gluten Structure
Kneading is a crucial step in bread making. It develops the gluten, the protein network that gives bread its structure and elasticity. Don’t be intimidated by kneading; think of it as a gentle workout for your dough. You can knead by hand or use a stand mixer. The goal is to achieve a smooth, elastic dough that passes the “windowpane test.” Can you stretch a small piece of dough thin enough to see light through it without tearing? If so, you’ve kneaded it perfectly.
Proofing: The Patience of Waiting
Proofing, the process of letting the dough rise, is where the magic happens. Yeast consumes the sugars in the dough, producing carbon dioxide, which makes the dough expand. This creates the airy texture we love in a good loaf of bread. Patience is key during proofing. The time required depends on the temperature and humidity of your environment. A warm, draft-free place is ideal. For those interested in perfecting their artisan bread skills, you might find How to make artisan bread at home step by step particularly helpful.
Baking in the Dutch Oven: The Final Act
Preheating the Dutch oven is crucial for creating that initial blast of heat that helps the bread rise quickly and develop a crisp crust. Carefully place the dough into the hot Dutch oven, cover, and bake. The covered baking creates the steamy environment needed for a perfect crust. After a specific time, remove the lid to allow the bread to brown further.
Achieving a Golden Crust: Tips and Tricks
Do you dream of that deep, golden-brown crust? This article provides more insights into How to get a perfect golden crust on homemade bread. A spritz of water before baking or adding a pan of water to the oven can enhance the crust’s color and texture.
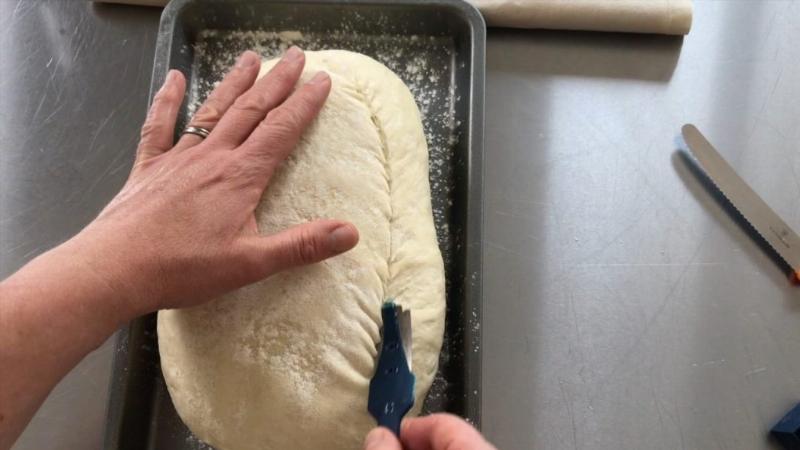 Scoring Bread Dough Before Baking
Troubleshooting: Common Crusty Bread Challenges
What if your crust isn’t as crusty as you’d like? Several factors can affect the crust, including the type of flour, hydration level, and baking time. Don’t get discouraged; even experienced bakers face challenges sometimes. Experimenting and adjusting your technique will eventually lead you to that perfect loaf. If you’re just starting out, check out our Best bread recipes for beginners.
Variations: Exploring Different Flavors
Once you’ve mastered the basic Dutch oven bread recipe, the possibilities are endless. Experiment with different flours, add herbs, spices, or seeds to create unique and flavorful loaves. From rosemary and sea salt to whole wheat and sunflower seeds, the combinations are limited only by your imagination.
Conclusion: Enjoy the Fruits of Your Labor
Making crusty bread in a Dutch oven at home is a rewarding experience. The aroma filling your kitchen, the satisfying crackle of the crust, and the taste of a freshly baked loaf are pure joys. With a little practice and these tips, you’ll be baking beautiful, artisan-style bread that will impress your family and friends. So, gather your ingredients, dust off your Dutch oven, and embark on this delightful baking adventure. Share your bread-baking triumphs and don’t hesitate to ask any questions – we’re here to support you on your bread-making journey!
Pingback: The Role of Hydration in Bread Baking and How to Control It - Bestbaking Recipes